How to Put Up Wallpaper? – Experts Review In 2023
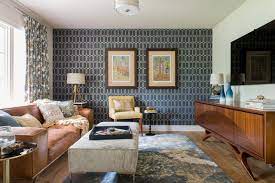
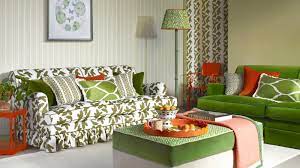
Wallpaper can transform a room from ordinary to extraordinary, adding texture, pattern, and personality to your space. Whether you’re aiming for a classic, elegant look or a bold, modern statement, putting up wallpaper is a creative and rewarding DIY project.
If you’re new to wallpapering, fear not – this step-by-step guide will walk you through the process, ensuring that your walls showcase your personal style flawlessly.
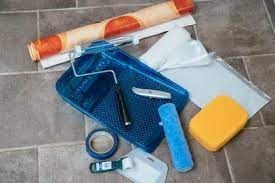
Gather Your Supplies:
Before you begin, make sure you have all the necessary supplies on hand. Here’s what you’ll need:
- Wallpaper: Choose a design that suits your style and room’s aesthetic.
- Wallpaper Paste/Adhesive: Choose a paste suitable for the type of wallpaper you have (pre-pasted or unpasted).
- Wallpaper Brush or Roller: For smoothing out wrinkles and air bubbles.
- Utility Knife: For trimming excess wallpaper.
- Sponge and Clean Water: To clean off any excess paste.
- Tape Measure and Level: For accurate measurements and alignment.
- Drop Cloth: To protect your flooring and furniture.
- Smoothing Tool: A plastic tool for ensuring a smooth application.
- Ladder or Step Stool: Depending on the height of your walls.
- Step-by-Step Wallpaper Application
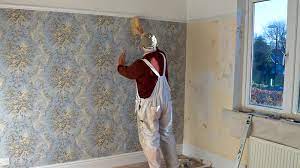
Step 1: Prepare the Room:
Clear the room of furniture or move it away from the walls. Lay down a drop cloth to protect your floor and any remaining furniture. Remove any outlet covers, light switch plates, and wall decor. It’s also a good idea to wash the walls to ensure a clean surface for the wallpaper to adhere to.
Step 2: Measure and Cut:
Measure the height of your walls and cut the wallpaper into strips accordingly, leaving a few extra inches at the top and bottom for adjustments. Use a level and a pencil to draw a straight vertical line on the wall, acting as a guide for your first strip of wallpaper.
Read: HOW TO CHANGE WALLPAPER ON YOUR APPLE WATCH: A STEP-BY-STEP GUIDE
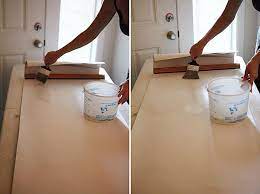
Step 3: Apply Adhesive/Paste:
Follow the manufacturer’s instructions for mixing or applying adhesive if you’re using unpasted wallpaper. For pre-pasted wallpaper, you might need to activate the adhesive by gently wetting the back of the strip.
Carefully fold the strip, paste side to paste side, without creasing it, and let it sit for the recommended time (often a few minutes) to allow the adhesive to activate.
Step 4: Position the First Strip:
Align the top of the wallpaper strip with the guideline you drew on the wall in Step 2. Leave a small overlap at the ceiling and let the excess hang at the bottom. Smooth out the strip using a wallpaper brush or roller, working from the center outwards to remove any air bubbles.
Step 5: Continue Hanging Strips:
Align the next strip’s pattern with the previous one before cutting it to fit. This will ensure a seamless pattern continuation. The edges of the wallpaper strips should slightly overlap (about 1/4 inch) to prevent gaps. Use a seam roller to gently flatten the overlap.
Read: STUDENT LOAN: A TOOL TO HELP YOU FULFILL YOUR DREAMS IN 2023
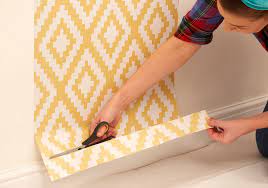
Step 6: Trim Excess Wallpaper:
Once the strip is in place and properly aligned, use a utility knife to trim the excess wallpaper at the ceiling and baseboard. Make sure your cuts are precise and clean.
Step 7: Repeat and Match Patterns:
Continue applying strips following the same steps until you’ve covered the entire wall. For patterns, take extra care to match them seamlessly. If your pattern has a repeat, be sure to align each strip accordingly.
Step 8: Work Around Obstacles:
When you encounter obstacles like outlets, switches, or corners, carefully cut around them. You can use a wallpaper smoother to press the paper against the obstacle and then make a precise cut using your utility knife.
Read: HOW2INVEST: EXPLORING INNOVATIVE INVESTMENT IDEAS FOR LONG-TERM SUCCESS
Step 9: Final Touches:
After all the strips are in place and smoothed out, use a damp sponge to wipe off any excess adhesive that might have seeped out. Gently press down the edges of the wallpaper to ensure a secure bond.
Step 10: Allow to Dry:
Let the wallpaper dry according to the manufacturer’s instructions before moving furniture back into the room or reattaching outlet covers and switch plates.
Congratulations! You’ve successfully put up wallpaper and transformed your space. Admire your work and enjoy the new atmosphere that your chosen wallpaper design has brought to your room.
Dealing with Corners and Trim: Ensuring a Neat Finish:
When you reach corners, such as the meeting point of two walls or the intersection of a wall and a door frame, special care is needed for a polished look. To tackle inside corners, slightly overlap the wallpaper from the first wall onto the second, allowing for a clean edge.
Use a utility knife to trim excess material along the crease where the two strips meet. For outside corners, cut the wallpaper at a 45-degree angle to create a clean seam without overlapping. This technique ensures a seamless transition and avoids bulky layers of wallpaper at corners.
Matching Patterns and Batch Numbers: Creating a Cohesive Design:
If your chosen wallpaper has a repeating pattern, ensuring a consistent match across strips is crucial for a professional appearance. Start by cutting your first strip from the roll, making sure to align it with the desired part of the pattern.
Read: HOW TO PAINT OVER WALLPAPER: A STEP-BY-STEP GUIDE IN 2023
As you continue, cut subsequent strips from the roll, paying attention to the pattern’s repetition. Matching up the patterns might require adjusting the height at which you start hanging each strip. Also, be sure to check the batch number on the rolls to ensure uniform color and pattern throughout your project.
Working with Textured and Specialty Wallpapers: Unique Challenges and Techniques:
Textured or specialty wallpapers, such as grasscloth or metallic designs, can bring an extra dimension to your walls but require specific considerations during installation.
Textured wallpapers may need extra adhesive to ensure a secure bond, and it’s recommended to use a soft bristle brush to press the material into intricate textures.
For metallic or reflective wallpapers, avoid pressing too hard with a roller to prevent damage. Instead, use a soft, clean cloth to gently smooth out the surface and remove air bubbles, allowing the design’s features to shine without distortion.
Creating Wall Murals and Accent Walls: Making a Bold Statement:
Wall murals and accent walls are fantastic ways to introduce a dramatic focal point to a room. Before starting, plan the layout and positioning of your mural or accent wall. It’s wise to start in the center of the wall and work your way outward to ensure balanced placement.
Read: EXPLORING AUZ100X: REVOLUTIONIZING THE FUTURE WITH ADVANCED AI
Keep in mind that larger designs might require more time for precise alignment and smoothing. Additionally, murals often involve multiple panels, so take extra care to align the edges seamlessly.
Remember, patience is key when working on intricate designs or large-scale projects to achieve a breathtaking end result.
Conclusion:
In conclusion, wallpapering can be a creative and enjoyable DIY project with stunning results. With the right tools, attention to detail, and a little patience, you can elevate your interior design and give your space a unique and personalized touch.